
This is a really simple and easy tutorial on how to make your own tear off notepad. So if you are making a notepad just for fun or something you wish to sell to your customers I really hope this tutorial will be helpful!
For the purpose of this tutorial I will be using my own design which you can get HERE.
TOOLS AND MATERIALS I USED:
- regular printing paper + 200gsm printing paper for front cover
- chipboard for the backing, I used 2mm thickness, I get mine at a local art store but I think THIS is very similar
- ruler
- craft knife
- binder clips
- cutting mat
- glue, I use white wood glue from the hardware store and it works really well
- brushes

I printed the pages on my inkjet printer using the ‘high’ quality setting to make sure the colors came out nice and vibrant. For the pages, I used regular printing paper, but for the cover, I went with a thicker 200gsm paper to give them a sturdier feel.
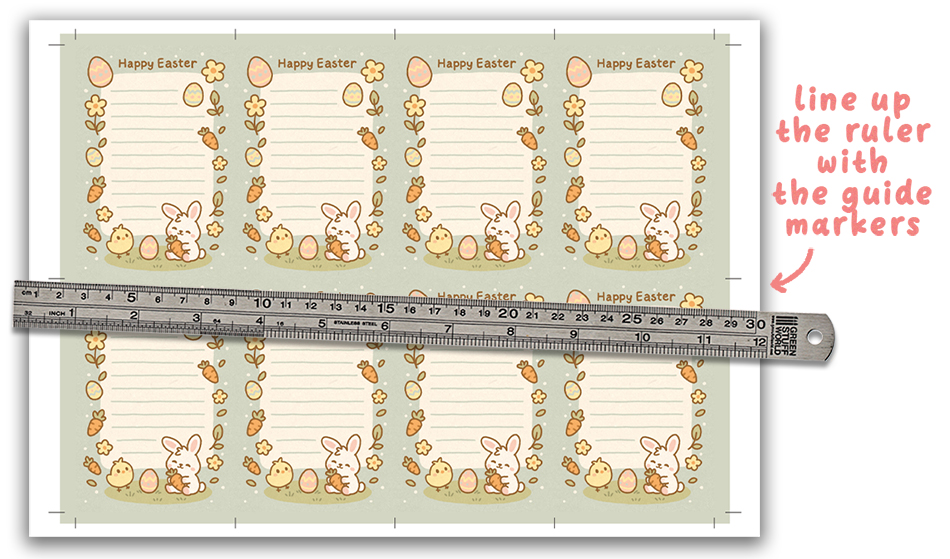
Just a quick note — if you’re using my PDF, I’ve included a simple graphic below to help guide you on how to cut the pages. Since I don’t have a guillotine cutter, I designed the file to work well for cutting by hand with a craft knife. Just be careful not to cut past the blue areas when trimming!
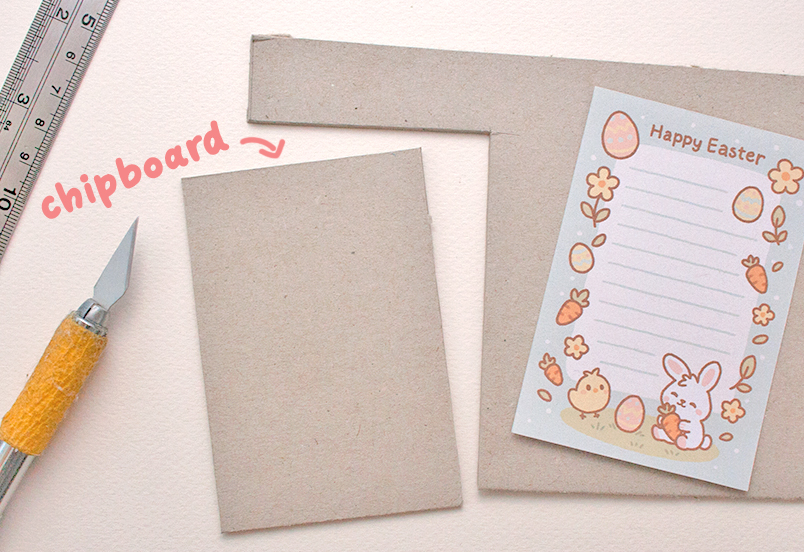
I printed five copies of the pages above, which gave my notepad just the right thickness. For the backing, I use a sturdy material — I believe it’s called chipboard in English. I usually buy it from a local art store, and it comes in various thicknesses, but I like to use the 2mm thick kind.
I take one of the pages and trace it on the chipboard and then I cut it out with a ruler and craft knife.
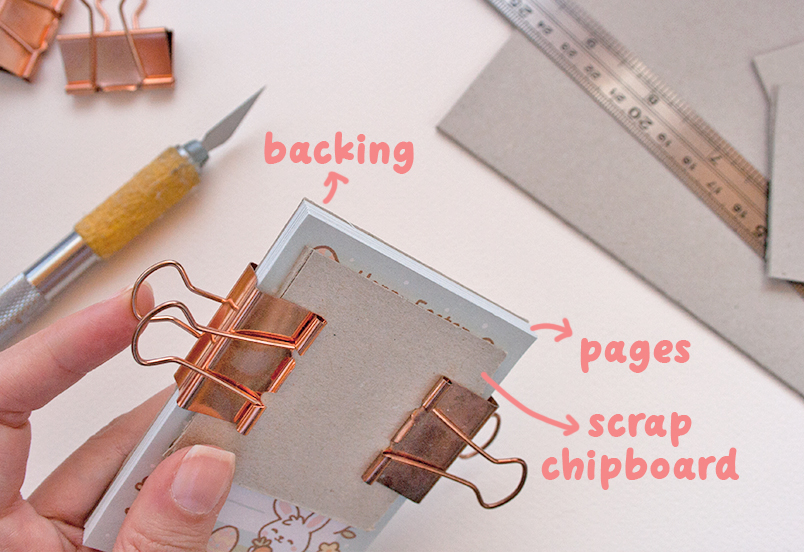
Once I have all the parts ready, I sandwich the chipboard backing, all my pages, and a scrap piece of chipboard on the front. I make sure the pages are neatly aligned at the top—this step is important to ensuring the glue coats everything evenly. Even coverage is super important—you definitely don’t want pages randomly falling out, hehe.
Once I’m happy with how it looks, I use these extra-large paper clips that are perfect for the job and clip them on either side of the notepad.
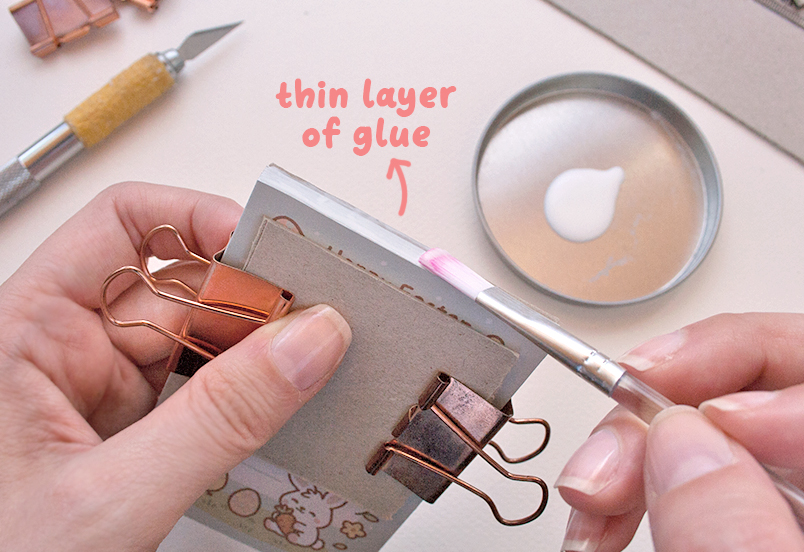
I apply a layer of glue to the top, making sure it’s nice and even. I use a white wood glue that I get from a local hardware store—it’s made by a company here in my country, so unfortunately I can’t provide an Amazon link. That said, any PVA white wood glue should work just fine, or you could try THIS one—I’ve seen other people use it with good results.
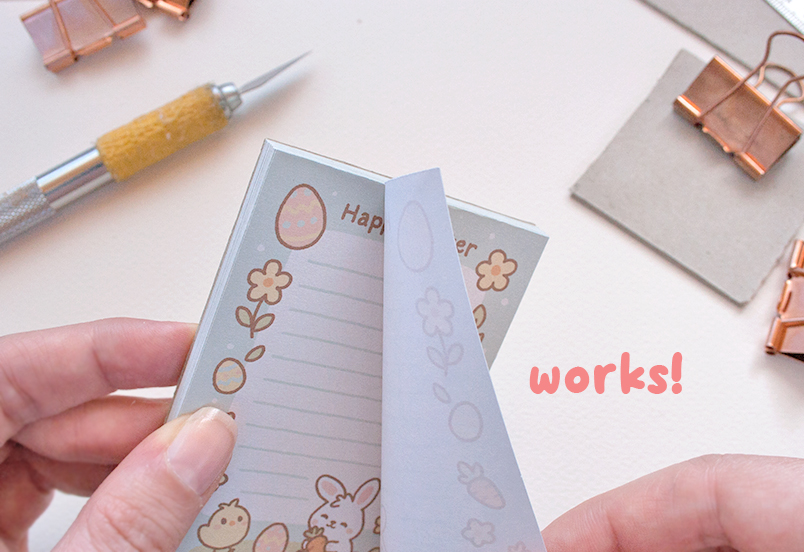
For me, it took about an hour for the glue to fully dry and harden—it turns transparent and slightly glossy. Once it was completely dry, I tested a page, and it worked! I’m super happy with how easy it is to make a tear-off notepad.
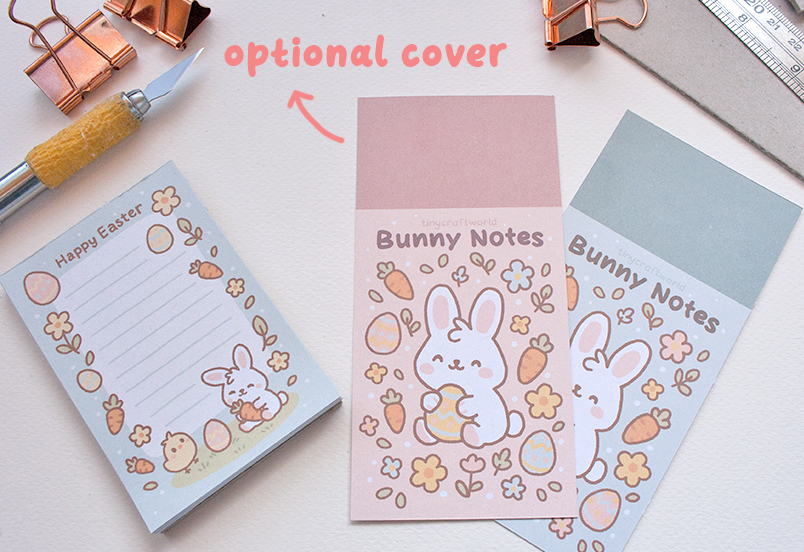
You could definitely leave the notepad as is, but I like to add a cute cover on top. In the file links, you’ll find two cover design options. Just cut them out the same way as the pages—follow the cut guidelines carefully, and be sure not to cut past the colored areas.
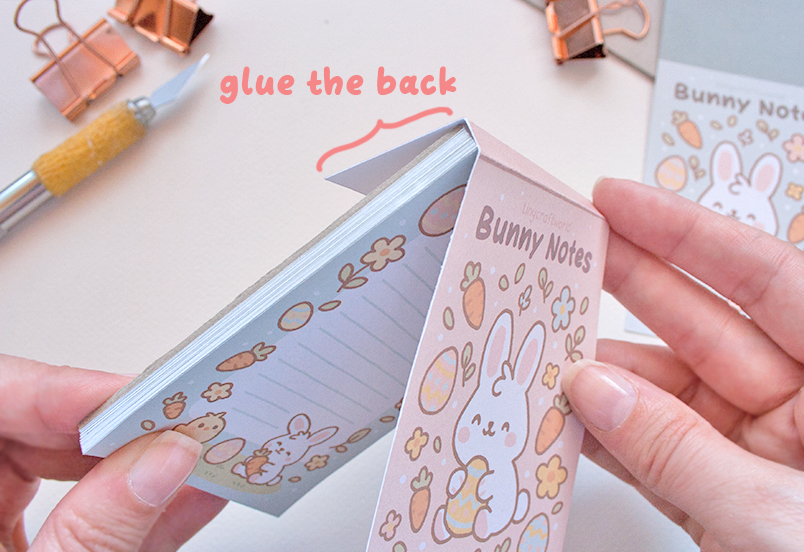
Depending on how thick your notepad is, fold the cover so it sits nice and flush. Then, apply glue only to the back flap and attach it to the chipboard backing. Make sure you don’t glue the top—only the back fold! (See the attached picture.)
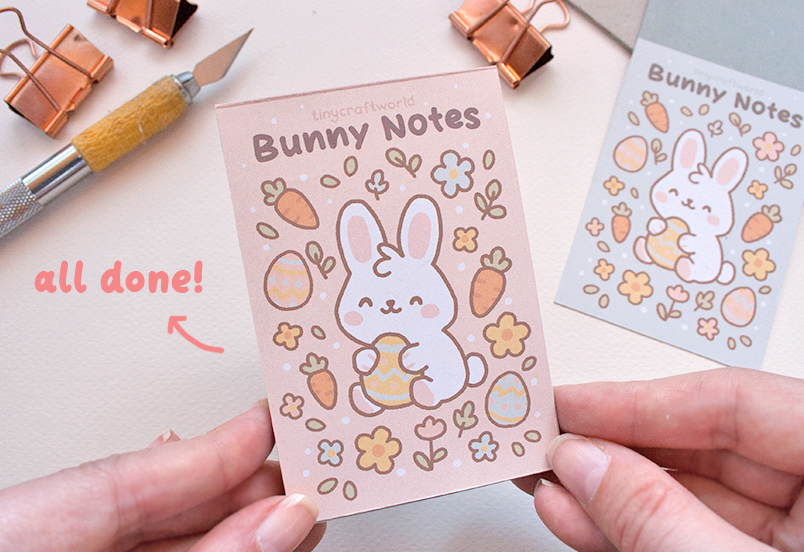
And you’re done! You should have a perfectly functional tear-off notepad!
I really hope you enjoyed this little stationery tutorial! If you have any questions or comments, feel free to reach out—I’d love to hear from you. And if you’re more of a video tutorial kind of person, I’ve also made a step-by-step video on my YouTube channel that walks you through the whole process.
Thanks for following along—hope you had fun making your own notepad!


Leave a Reply